Adding a New Partner
Partner refers to a person or company that in some way or another have helped you to produce and obtained the goods that you are now selling. These vendors simply represents as source of your merchandise and it is a must to have their profile entered to your system and be able to manage the data as well (in only needed) just for you to have a record that you might needed someday for your business. To start on creating a profile for your vendor, follow first the following guidelines:
-
Log in to the site using your Admin credentials.
-
Click the Dashboard menu. From the given tabs, click Fulfillment and select Partners.

-
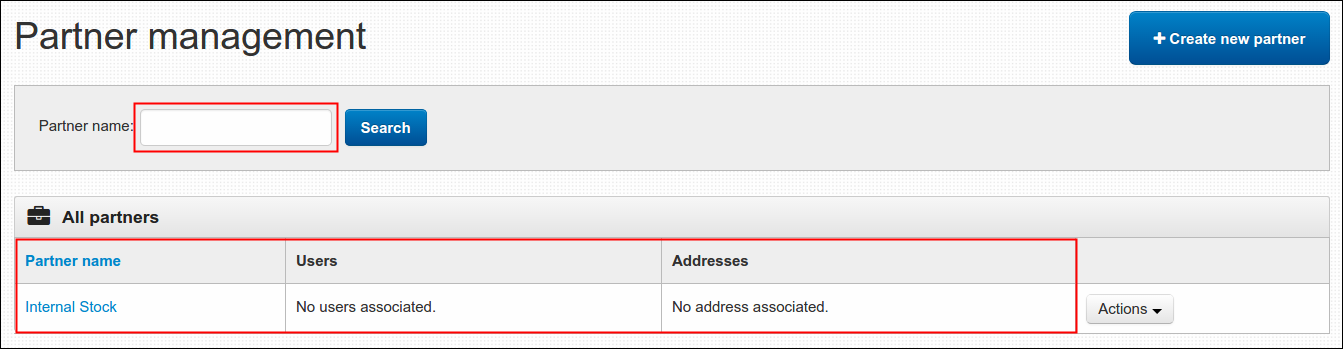
As you notice, you are now at Partner Management page where you can find a table named All Partners. This table displays the list of present partners created on this section. As of now, we only have Internal Stock vendor. You can see as well that a Search button is available on this page, if you want to find particular partner with no effort then use this button. Simply enter the name of vendor on Partner Name field and hit the button.
-
To add a new partner, click the Create New Partner button. A form will pop out and the only thing that you need to do next is to enter the name of your partner on Name field and click Save. Newly created partner will now be added under All Partners table. It was easy creating profile of your merchants, isn't it?
Update the Address and Linked Users of an Existing Partner
All just created partners always have no information yet about the linked Users and detail of its Addresses after creation. This is always a administrators duty to update it manually. To start that, you must of course logged in using your admin credentials. Click the Dashboard menu, then Fulfillment and pick Partners from the list. Next relative steps are as follows:
-
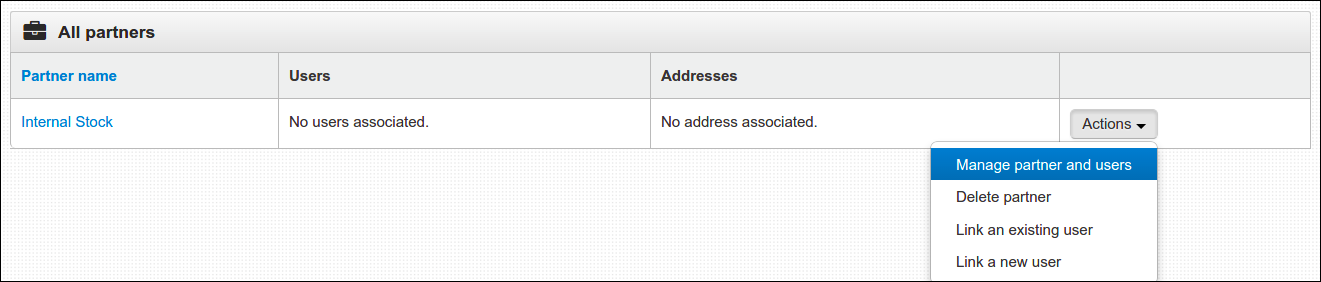
On All Partners table, select the Partner that you wish to update. Click its Actions button and select Manage Partner and Users. A new page will pop out with sections where you can edit the name of your partner (left side of the page), enter address (right side) and link a user (bottom).
-
To change the name of your partner, just enter the new name on the Name field and click the Save button.
-
To enter address, fill in the following fields
- First line of address- this may refer to house or unit number.
- Second line of address- street name or building name.
- City- name of town.
- State/County- name of certain area.
- Post/Zip Code- series of letters and numbers.
- Country- select one from the list.
Click the Save button to finish.
-
To link a user, click any of the two available buttons. Whichever applies, refer to Link a New User to an Existing Partner or Link an Existing User to an Existing Partner guidelines respectively.
After linking a user, you may cancel your just made action and unlink the user. Simply click the Unlick User button, a message will appear confirming that you unlink the user from certain partner.

All made changes (like addition of address and linking a user) will display on the menu right away.

Link an Existing User to an Existing Partner
The purpose of linking a user to a particular partner is to entitle the person a limited access to dashboard where they can manage to view and update the information of the concerned products. These users are probably your contact persons from different merchants associated with your business. To learn more about linking a user to an existing partner, follow the steps below:
-
First thing to do, log in to the site using your admin credentials.
-
Click Dashboard, then Fulfillment and from the list select Partners..
-
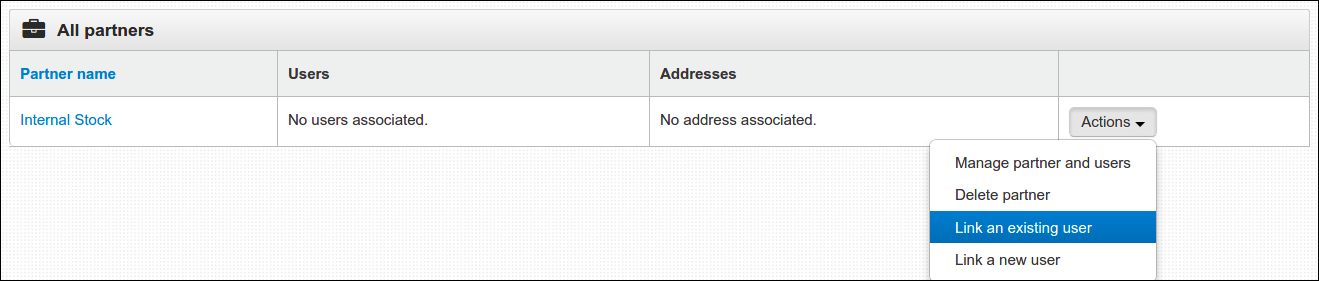
On All Partners table, choose the partner that you wist to have a linked user. Click Actions andss select the Link an existing user.
-
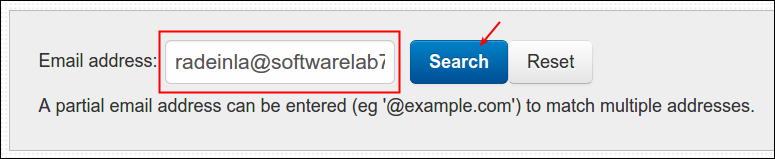
A new page will display, enter the email address of the user on Email Address field and click Search. You may clear out the fields as well as the results by clicking the Reset button.
-
Relevant matches will display on the same page, to continue click the Link User button. A message will display saying that the user is already linked to the partner and that's it you're done here.

Note: If your email address doesn't match any and you received the 'No users found' result, obviously that email address is not registered yet on the system. You may refer to the next section and learn how to link a new user to an existing partner.
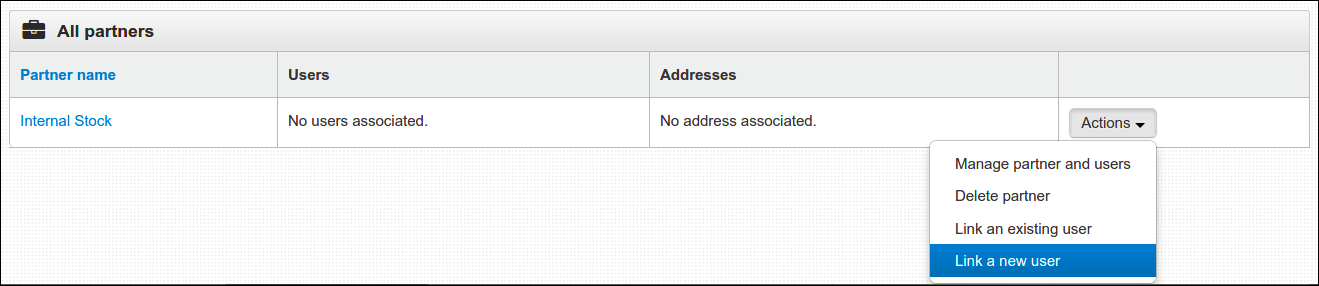
Link a New User to an Existing Partner
This is kinda similar with above mentioned guideline, the only difference is that the user that we are about to link in a partner is a new one, the unregistered one. These person are the one who haven't created yet an account to your site and this guideline will teach you to do that for them. Simply follow the steps below:
-
Log in using your Admin credentials.
-
Click Dashboard menu, Fulfillment and then select Partners.
-
Choose your target partner from the list. Click Actions and select Link a new user.
-
A new page will display with a Create User form. Answer all the following required fields:
- First Name and Last Name- name of user.
- Email Address- user's valid email address.
- Password and Confirm Password- must consist of 6 character, either number or letter or combined.
- User Role- level of permission to manage the dashboard.
- Full Dashboard Access- all menus including user management.
- Limited Dashboard Access- products linked to a certain partner only.
-
Click Save to finish. As you return to the Partner Management page, you'll notice that the newly created user linked to a partner is now displayed under Users column.

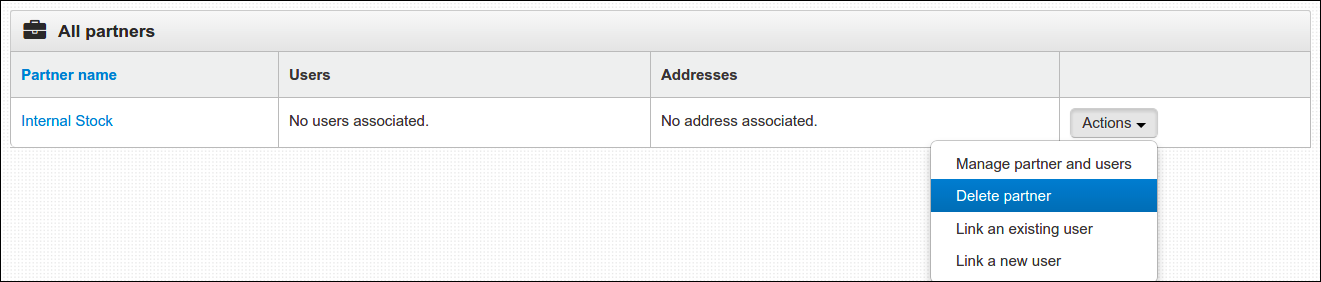
Delete an Existing Partner
After learning how to create, update, and link a user to a partner, the last thing that Actions button can offer is to delete a merchant. Deletion applies to person or company that no longer associated with your business. To start the removal of partners, see the step step instructions below:
-
As always, enter the site using your Admin credentials.
-
Click Dashboard, locate Fulfillment menu and select Partners.
-
You are now again facing the Partner Management page. From the All Partners table, locate the vendor that you wanted to remove. Click its Actions button and select Delete Partner.
A short message will pop out that confirms if you are sure to delete the partner. To continue in removing the profile of inactive vendor, click the Delete button. To void, click Cancel and page will return to the menu.