Adding a New Product
-
Log in using Admin credentials.
-
After you signed in, click Dashboard.
-
Click Catalogue and select Products.

-
You will be then directed to Product Management page. Go to Create New Product section and choose one product type. If there is none, follow the guideline in creating new product type, see Adding a new Product Type.

-
After selecting product type, click New Product button.
-
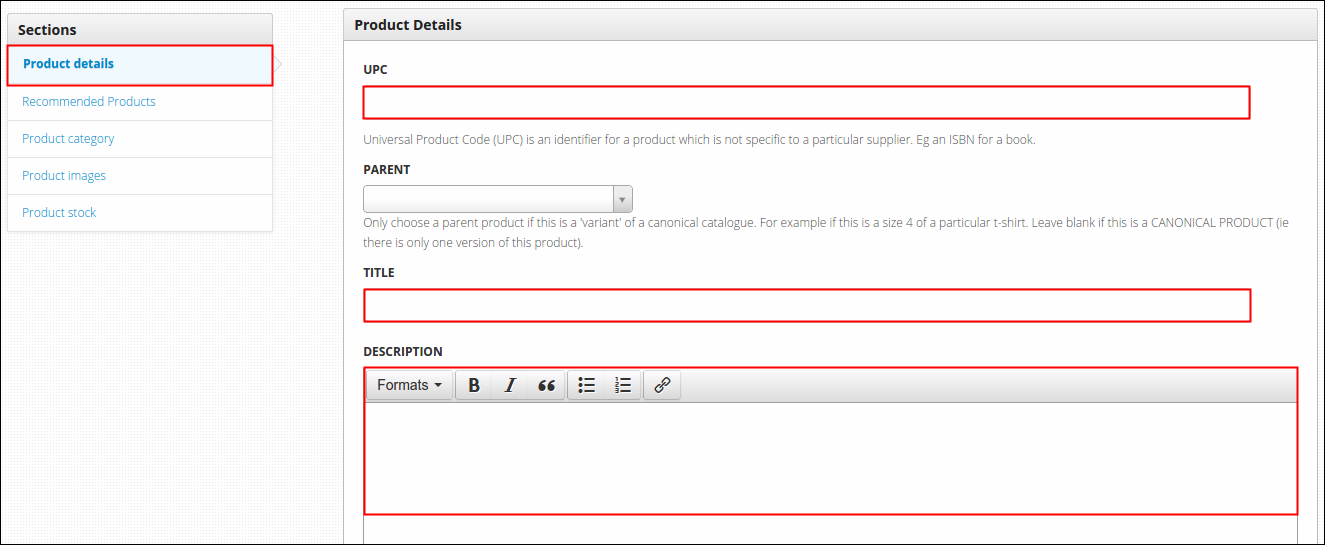
You'll be directed to new page then, at Product Details section, fill in all the required fields:
- UPC- or Universal Product Code, this is very useful in creating barcode symbol.
- Parent- applies to product that has various versions (i.e. sizes)
- Title- name of product.
- Description- refers to product description. This is the right venue to describe product origin, materials used to build the product, what inspires the designer to create such product and alike statements. Important Note: Refrain from copy pasting from web straight to this section, this results to rendering of style copied from online. To avoid this, paste your copied words to a text editor tool first, for Mac users use TextEdit. From a text editor tool, copy the words and then you may now paste it on this section.
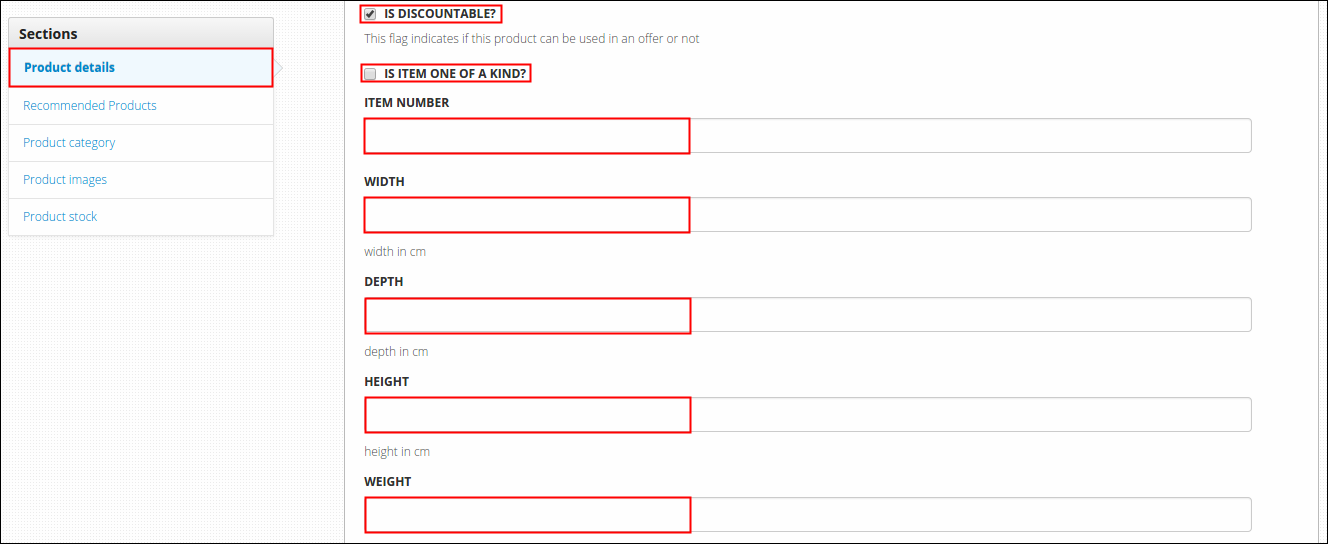
- Is Discountable?- this means you're allowing your product to participate on promotions that the site has to offer. If you think this applies to your product then toggle this option.
- Is Item one of a kind?- this applies to rare products with limited quantity like collector's item. When you toggle this one, quantity display on product page will be then removed.
- Item Number- unique numerical identifier of product.
- Width, Depth, Height and Weight- displays the dimension and weight of the product.
- Disabled- this enables you to make your product inactive, applies to old product with least demand from market. The effect of this option is that it will hide your product on main site, just hidden not deleted. Under Dashboard menu, Catalogue then Products, a new tab named Disabled Products will be added to make room for this type of product.
- Priority- this is the section where you can manage the order of your products. Most likely, this applies to Veritas Greeting Cards. Currently it was set by default to alphabetical order but you may manually arrange the orders of it through this option. As what the guide says, products are displayed by priority--a higher number giving higher priority. For example, you have 3 products namely: A, B and C. Currently, when this option isn't used or with 0 value, page will automatically display the said 3 products in alphabetical order but you may display these 3 in reverse order (C B A instead of A B C) if you want to. To do so, set the priority of C to 3, B to 2 and A to 1. The one with the higher number displays first while the least is placed lastly.
Note - Copy pasting information to Product Description will result in the text styling being copied too. Please use plain text paste (CTRL+SHIFT+V using Windows or CMD+SHIFT+V using Mac) if pasting into the product description.
-
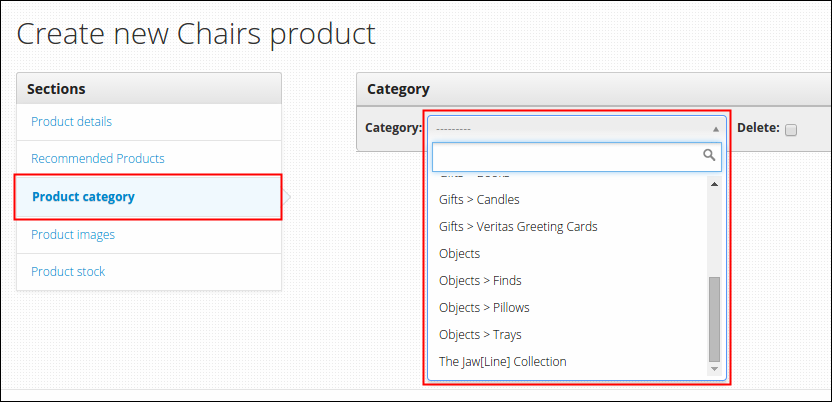
At Product Category, select one category from the list. If none, refer to Adding a new Category and learn how to create a new one.
-
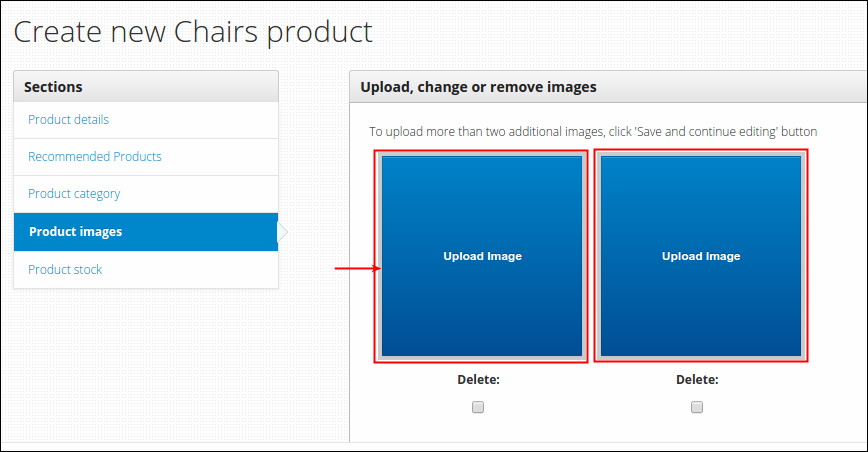
At Product Images, click Upload Image and locate the photo of your product that you want to be posted.
-
At Product Stock, fill in all the required fields:
- Partner- refers to the source of your product. Simply choose one from the choices, if none refer to Adding a New Partner guideline and learn how to create one.
- SKU- or Stock Keeping Unit, this is a code that consists of letters, numbers or symbols that uniquely identifies the product. Normally used in inventory data management.
- Num in Stock- refers to product count.
- Num allocated-
- Cost Price- product gross price (including tax), displayed on main product page.
- Price(excluding tax)- product net price, displayed on product page- Product Details tab.
- Shipping Price- shipping cost of product.
Optional fields:
- Low stock threshold- this enable you to set an alert when product stock gets low and reached the number entered on this field. Alerts will automatically added on Stock Alerts table, as what described on Managing Low Stock Alerts.
- Retail Price- means recommended price of the product, this will serve as comparison of price only with existing similar products in the market.

-
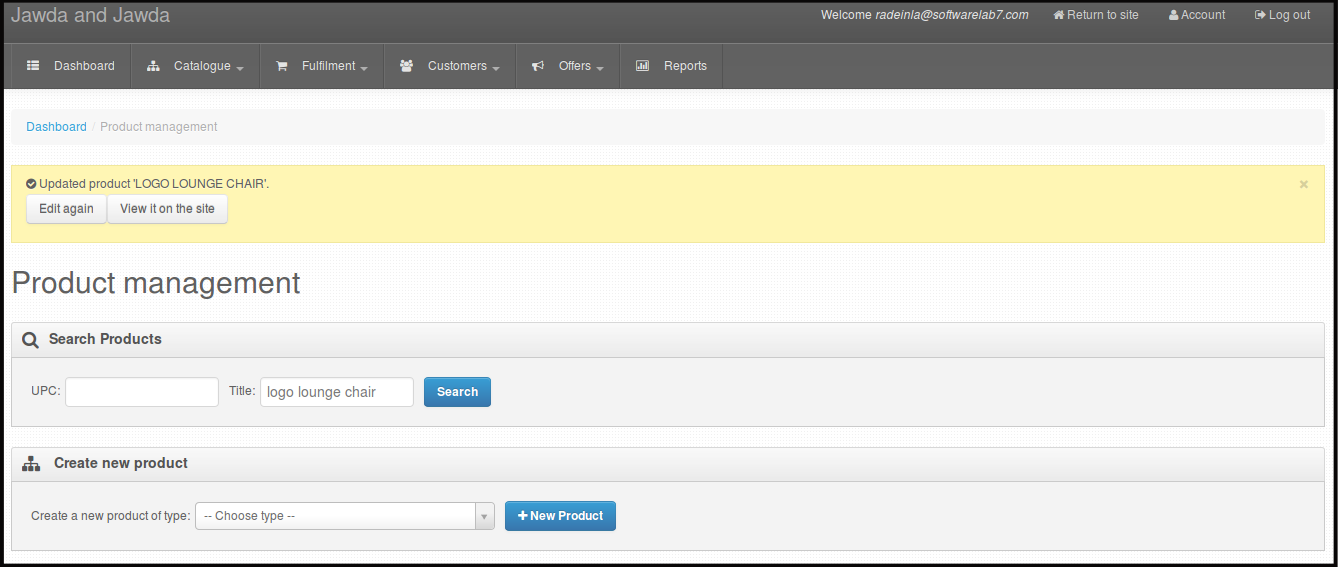
Click Save. A message will appear to confirm that your product is created, it must now added under Products table and also visible on the main site.
Note: Along with confirmation message are the two different useful buttons such as:
- Edit again- if you missed something, click this one.
- View it on the site- to scan the product on main site, click this one. br>
Editing an Existing Product through Dashboard
-
Log in using Admin credentials.
-
Click Dashboard, Catalogue and select Products.
-
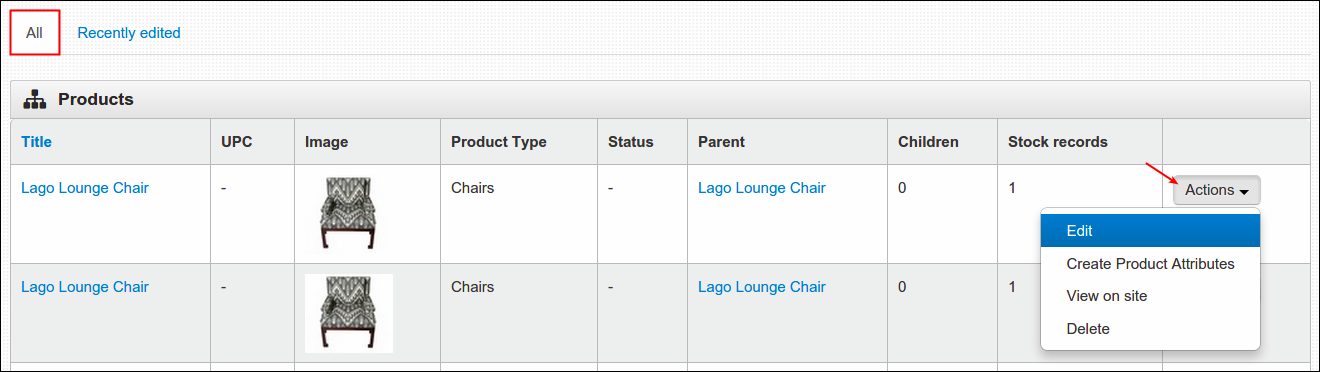
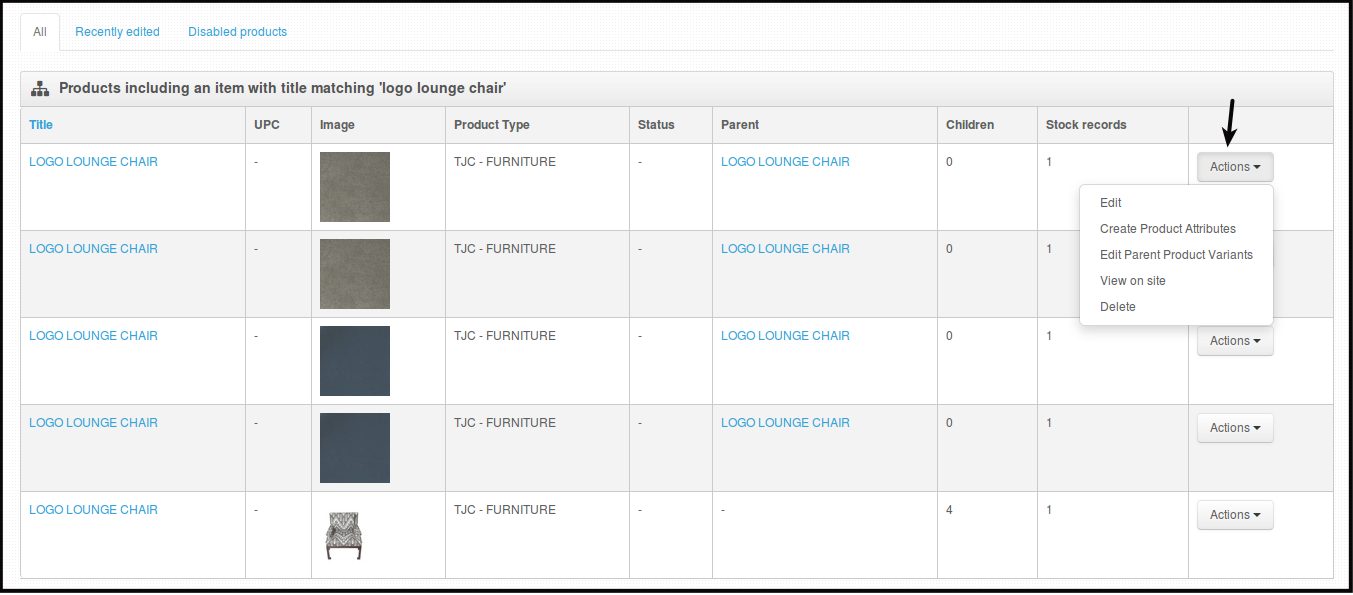
List of created products will display here. Choose one product that you wish to modify, click Actions and select Edit.
-
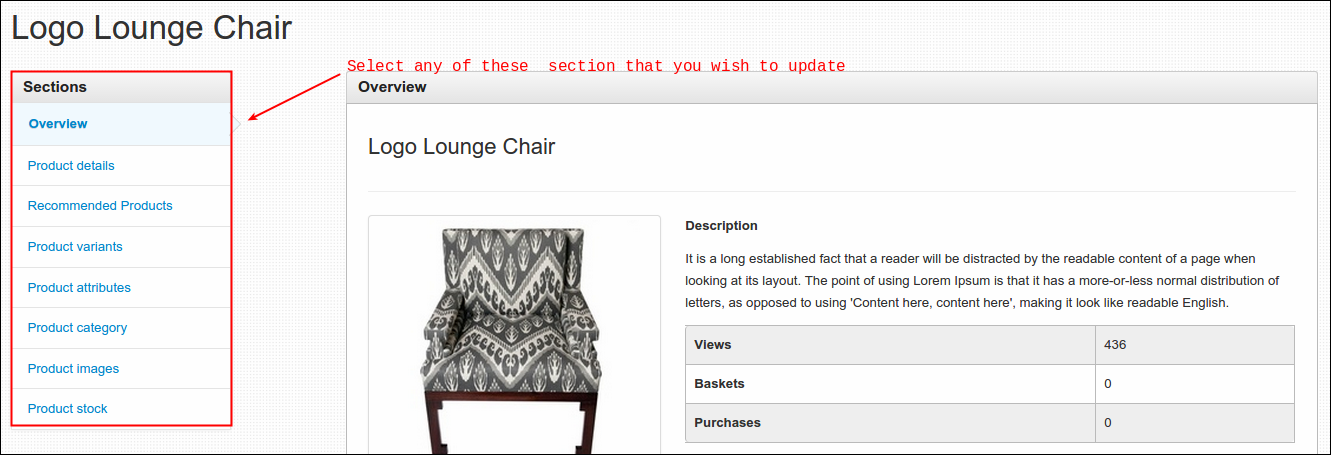
Go to section that you wish to edit.
-
Click Save . Select Save and continue editing if you missed something or Cancel to return to the menu.
Editing an Existing Product through Site
-
Log in using Admin credentials.
-
Go to Shop menu and locate the product that you wish to edit.
-
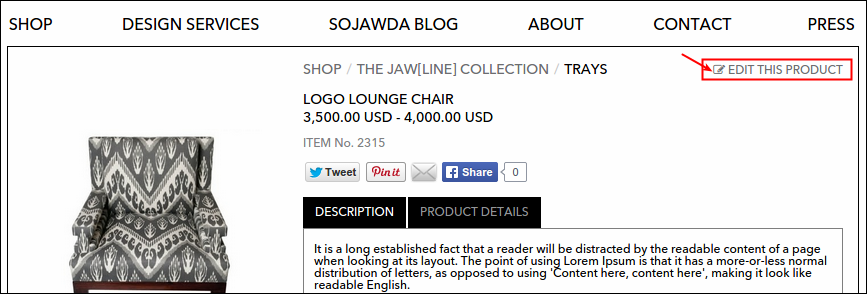
You will be directed to selected item's detailed page. Click Edit this product link to proceed with updating the product.
-
Go to section that you wish to edit.
-
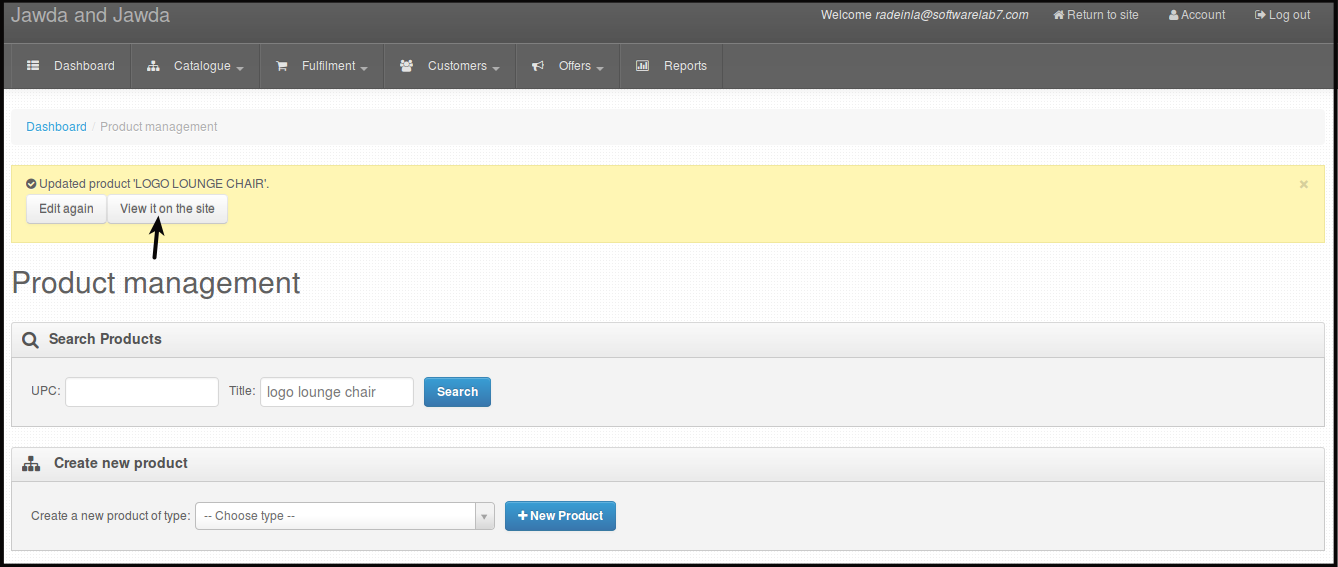
Click Save to finish. A message that says "Updated product'name'" must show up.
Note: Recently edited items can be found here.

Creating Products that has Attributes
-
Log in using Admin credentials.
-
Click Dashboard, Catalogue and select Products.
-
Choose one product that you wish to obtain an attribute, click Actions and select Create Product Attributes button.

-
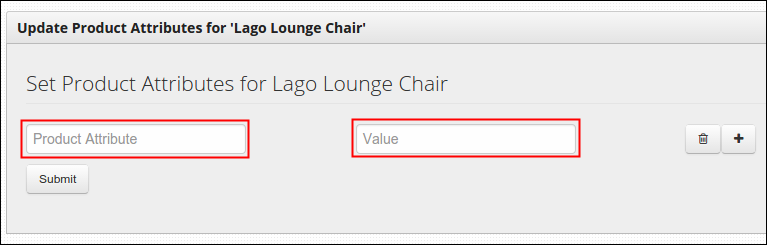
Fill in the following fields:
- Product Attribute- attribute title (ex. Author, Designer)
- Value- value of the created attribute title (ex. Saba Jawda, Sarah Jawda)
Note: You can use the following buttons to;
-
add a new field.

When clicked, a new set of fields will come out.
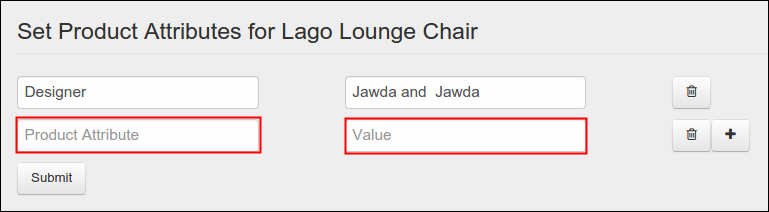
-
delete existing field.selected field will grey out once clicked.

When clicked, selected set of fields will grey out and will totally removed after clicking the Submit button.
-
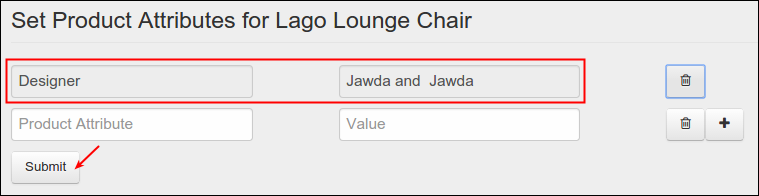
Click Submit to Save.
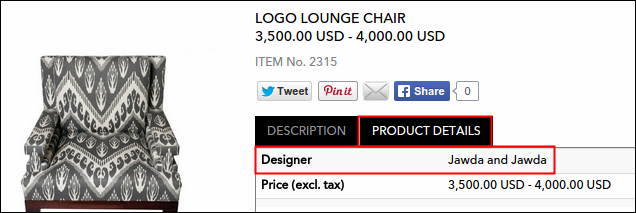
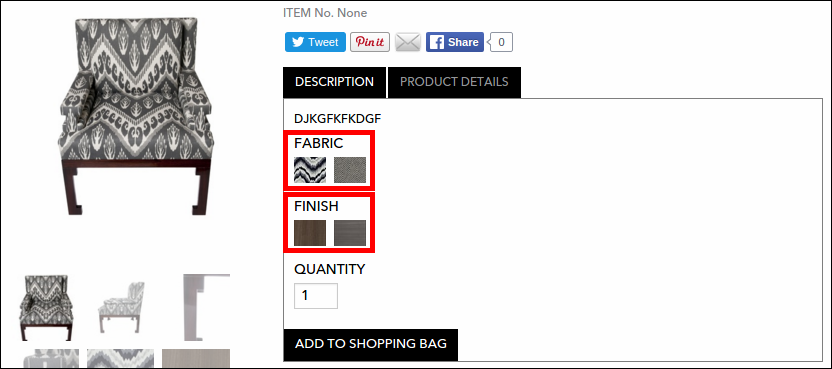
Entered attributes will display on Product Details tab, just like this.
Creating Products that has Different Colors or Sizes or Variants
-
Log in using Admin credentials.
-
Click Dashboard, Catalogue and select Products.
-
Choose one product that you wish to obtain product variant. Click its Actions button and select Create Product Variants.

-
Fill in Option Group and its Options. You can add a thumbnail per option by clicking Choose File, a new window will come out, locate the image and then upload it afterwards. Be advised that Delete (trash icon), View (camera icon) and Add (plus sign icon) buttons are present on this page.
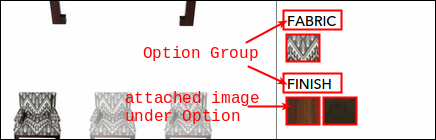
- Option Group- product attribute title. (ex. Fabric, Finish)
- Option- value of created option group. (ex. Cotton, Charcoal)
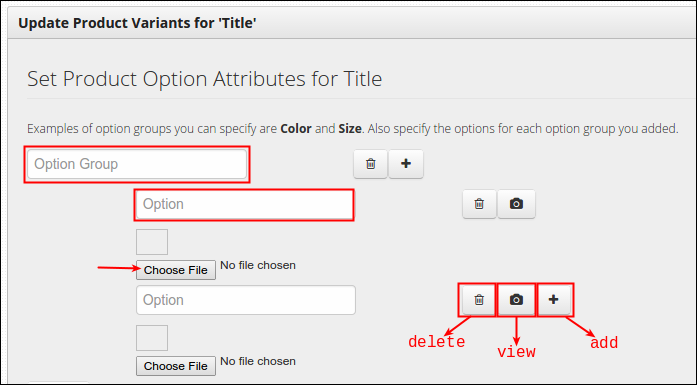
Note: You can save an option even without a thumbnail or image, thus it will display on the site with its given option name. See sample below:

-
Click Submit to Save.
Successful entry of product variants will display on product's main page, see below:
Uploading the Thumbnail of Product Variant
Thumbnails of product variant displays on product page when images are provided during the creation of variant. In case images are not uploaded during the process, a label (single option) or a selection box (multiple option) will appear on product page instead. There is no need to perform again the method of adding new product to make it visible, uploading a thumbnail on its parent product will do the work. This procedure is quite similar with the process described in Creating Products that has different Colors or Sizes. To start, simply follow the step by step procedure below:
-
Log in using admin credentials.
-
Click Dashboard, Catalogue and select Products.
-
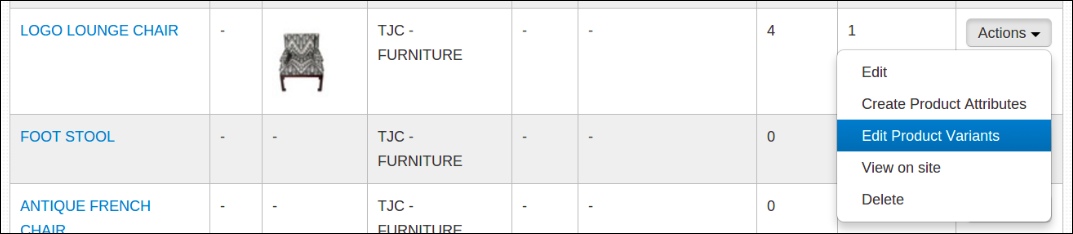
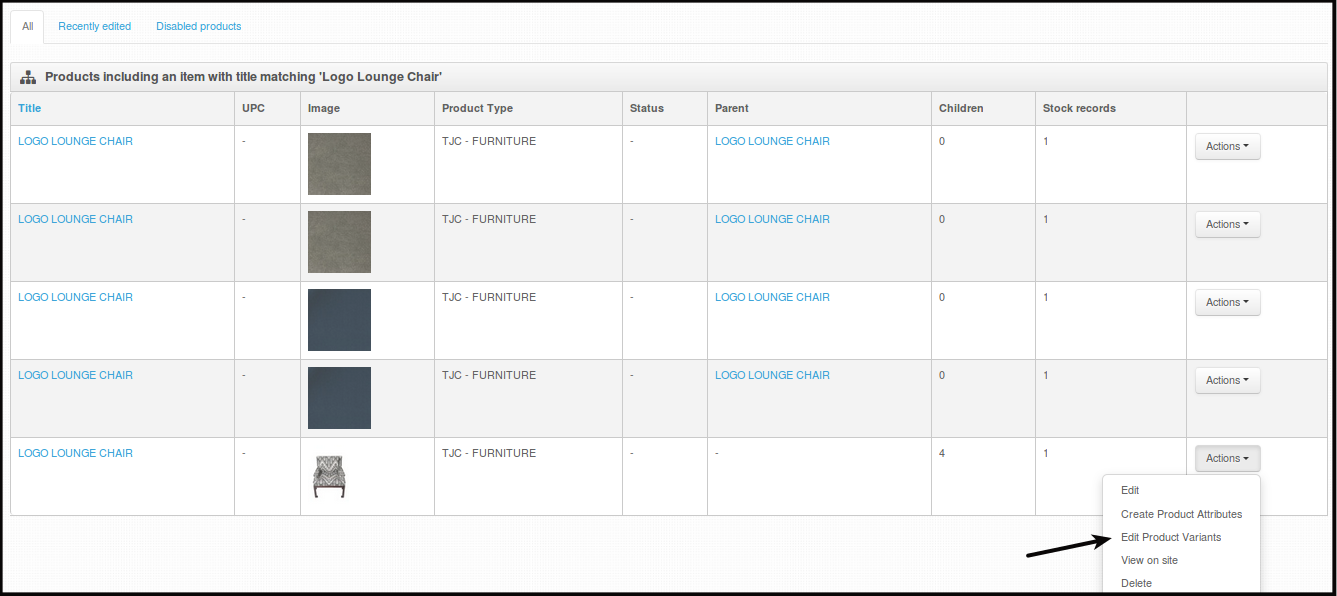
At the end of the page, you'll find the Products table where all products along with their details are listed. Select the product with present variant that you wish to have an image. Click Actions button and select Edit Product Variants.
-
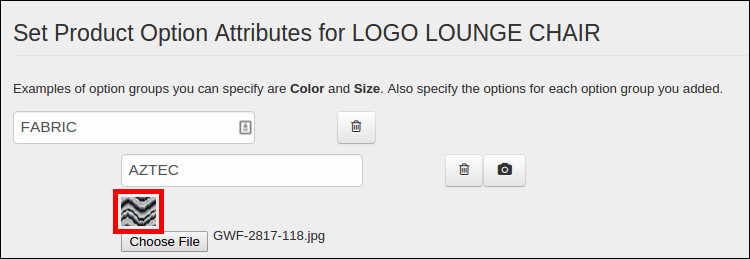
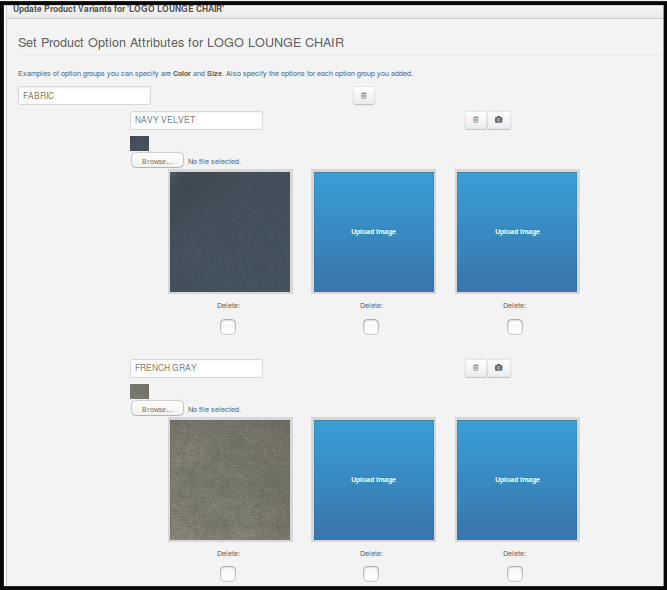
You are now directed to Update Product Variants for (name of product) section. Go to your concerned option that needs an image. Below the option name, you will find the Choose file button. Click that button and then upload your preferred image. I will give you an example, let's try to add image on AZTEC option.
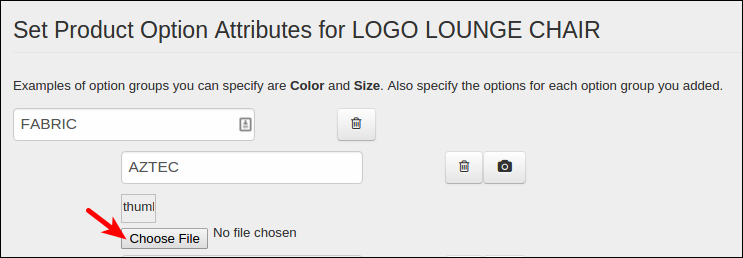
After I uploaded the image, thumbnail box is now filled of the uploaded image. Same process applies to other variants that you wish to be presented by a thumbnail.
-
To save everything, just click the Submit button located at the lower section of the page. After I provide images for AZTEC, CHEVRON, WOOD and GREY from their respective groups, here's what it looks like now on product page.
Updating the Details of an Existing Product Variant
During the creation of product variants, each entered options has its own section or page where you can modify the attributes if needed. This is the same page that you will encounter in Adding a New Product but with few additions. Let me guide you thoroughly, steps are as follows:
-
First, log in using admin credential.
-
Click Dashboard, Catalogue and select Products.
-
From the Products table, select the parent product of option that needs an update. That can be a price change, update of posted image and the like. Click its Actions button and select Edit. As an example, I will try to edit the Logo Lounge Chair.

-
You are now facing the sections of parent product or of Logo Lounge Chair. Intended change to certain variant shouldn't performed here but on its separate section.
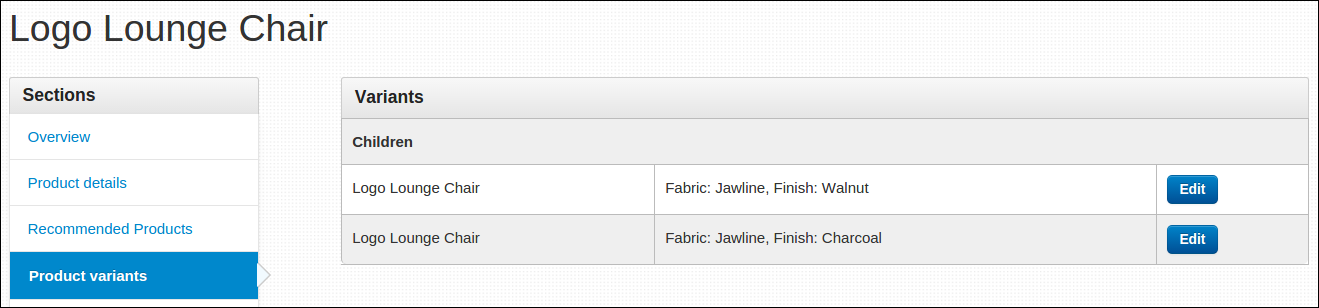
Now click Product Variants section. This sections displays the variants added on parent product. Logo Lounge Chair has two child products (jawline-walnut & jawline-charcoal), just like what shown here:
-
As what I have mentioned on intro, variants present on parent product has its own page with sections as well. Now, let us try to get there. From the list, select one child product and click Edit. Let's edit the image and price of second child product (fabric: jawline; finish: charcoal).
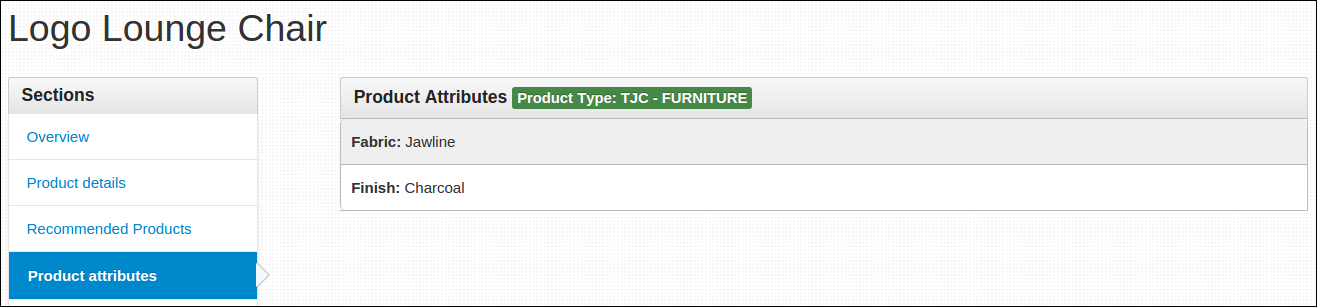
On Product Attributes section, you'll see the attribute description of selected variant.
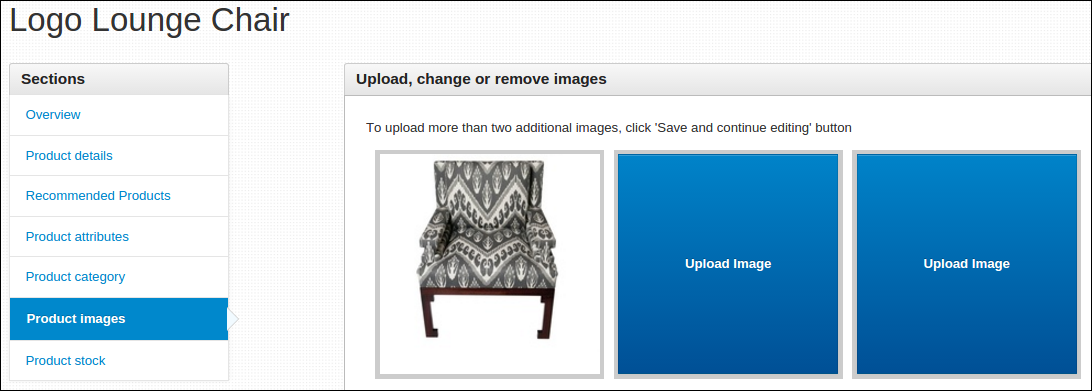
On Product Images section, the best photo that you should upload here is the end product of mixed options from different option group (i.e. a chair with a jawline fabric and charcoal finish).
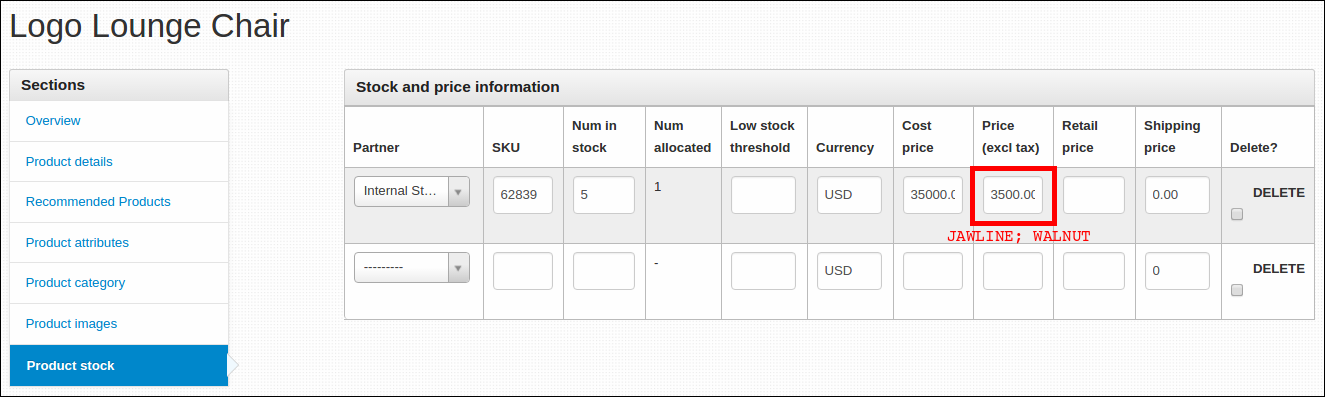
On Product Stock section, you may freely update the price of a variant whenever you want.

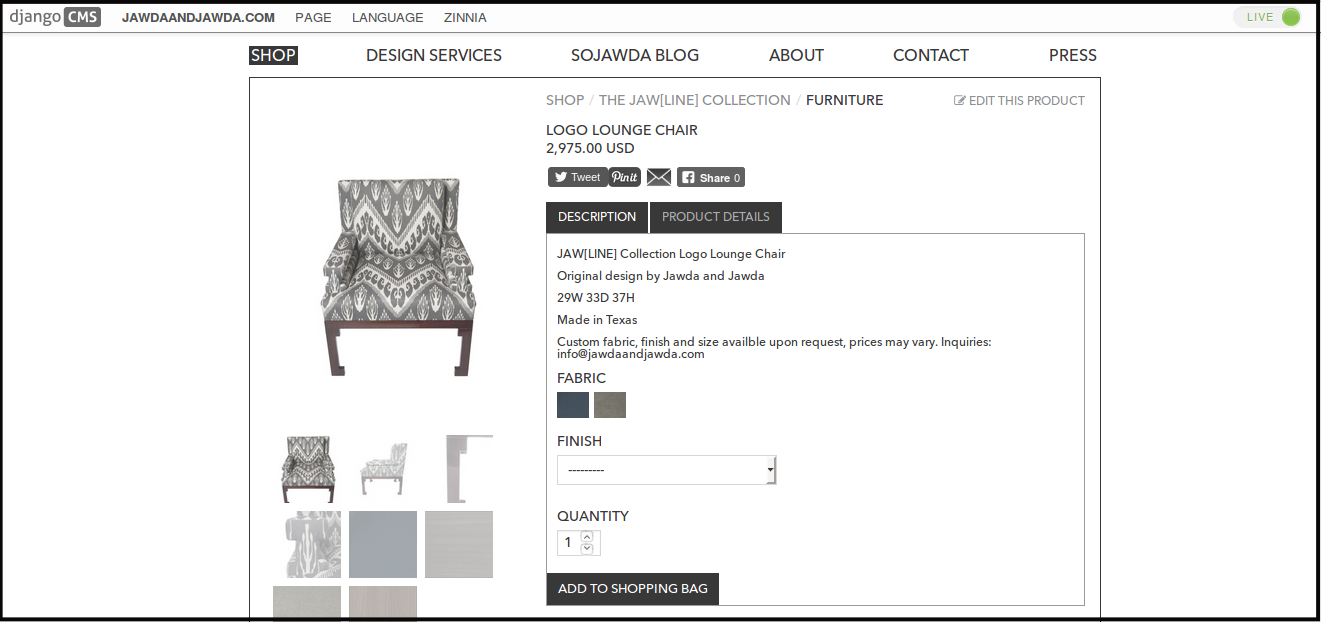
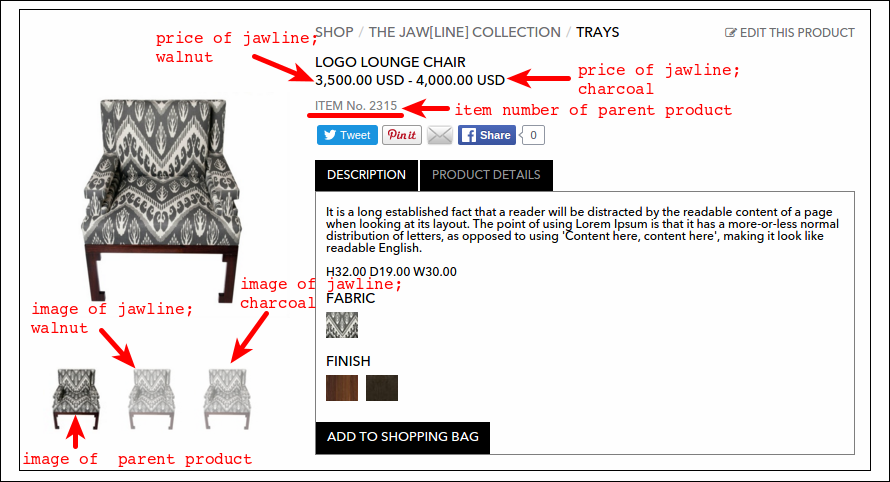
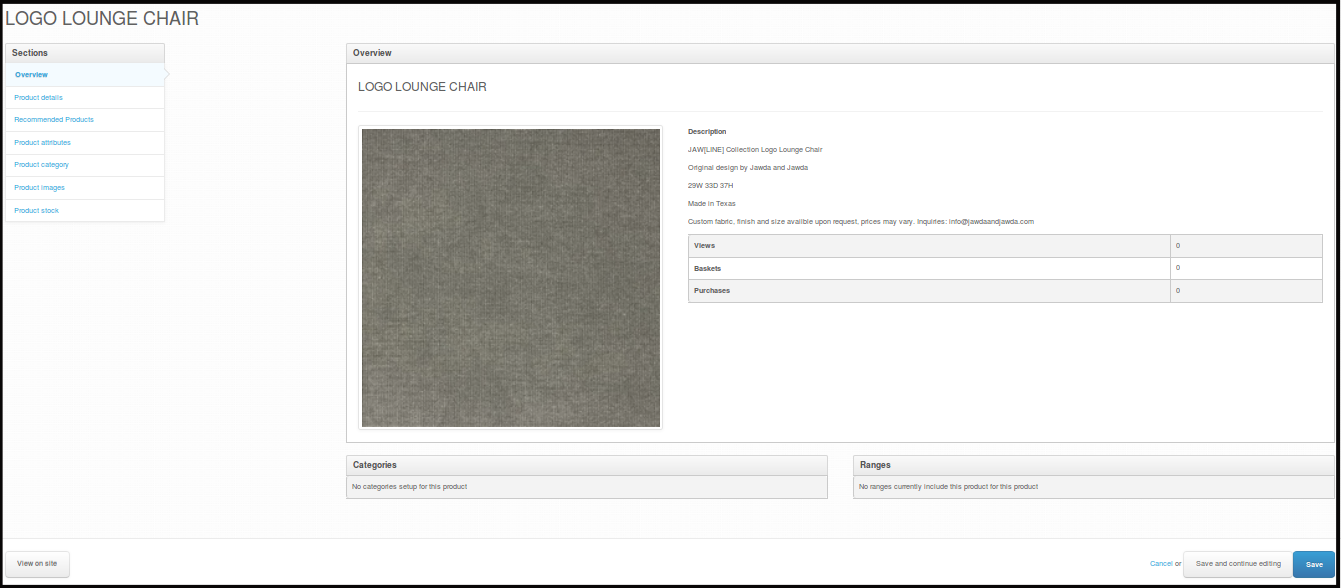
Now, let me show you how those updated information displayed on main site. At first glimpse, with no clicked thumbnails or options yet, here's what the Logo Lounge Chair product page looks like. Prices of both options are displayed in a price range manner, displayed item number is from the parent product and images are all displayed as well. Note: Image of parent product is always displayed no matter what.
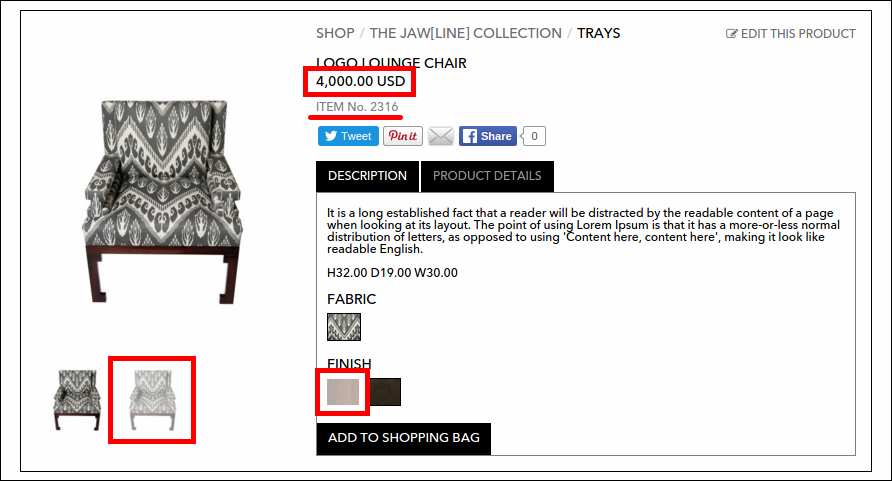
Let us now select each of the available options. Let's click the fabric Jawline and the finish Walnut. Observe what changed on product page. Displayed price, image and item number is the selected option only while thumbnail of unselected option greyed out.

Same goes with fabric Jawline and finish Charcoal when selected.
Delete Variant Picture
-
Log in using Admin credentials.
-
Click Dashboard, Catalogue and then locate Products.
-
Search Title of the Product you want to Delete variants picture.
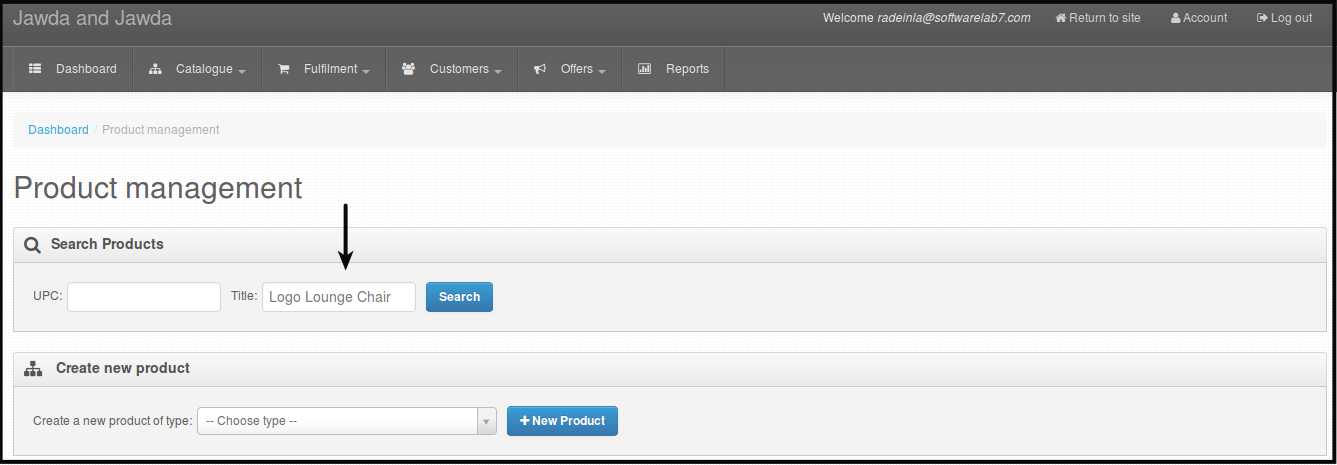
-
Click Search.
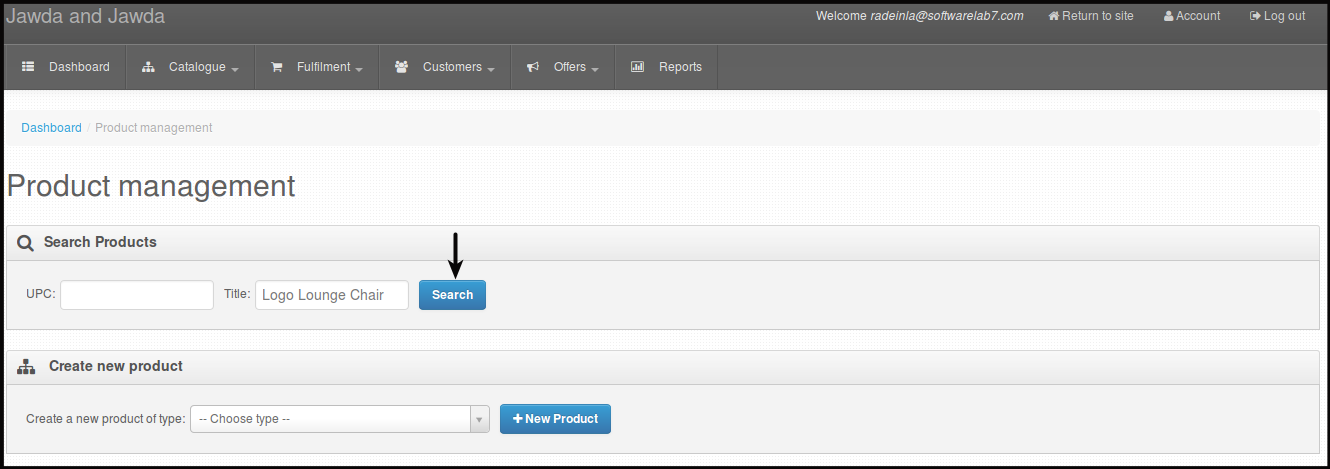
You will be directed to this page.
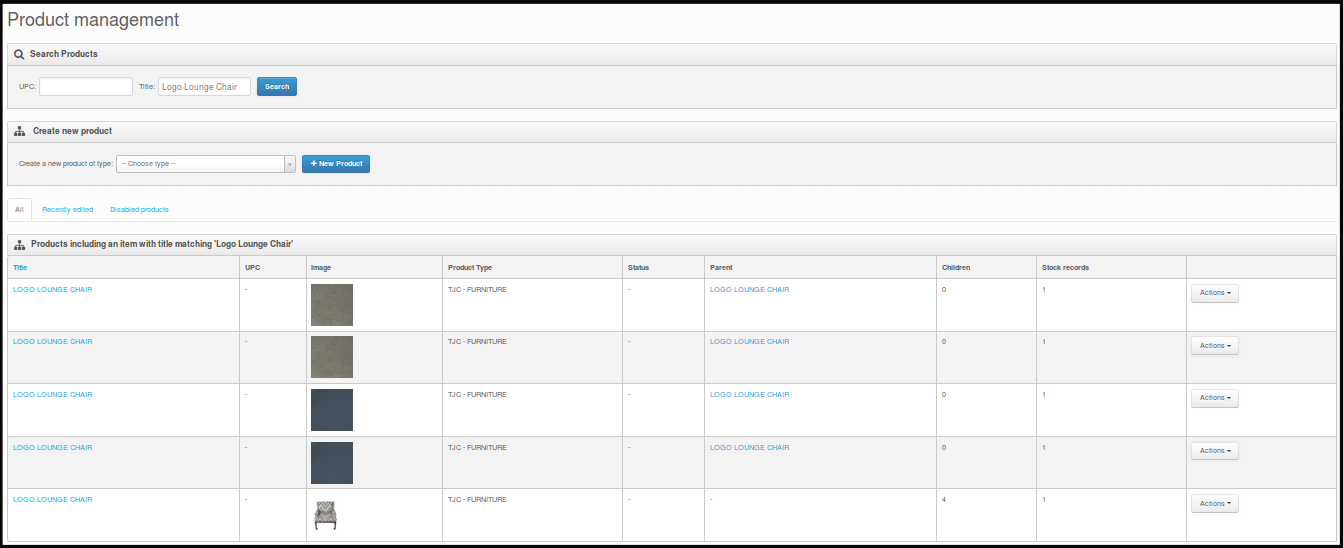
-
Look for the Parent product, click Actions.
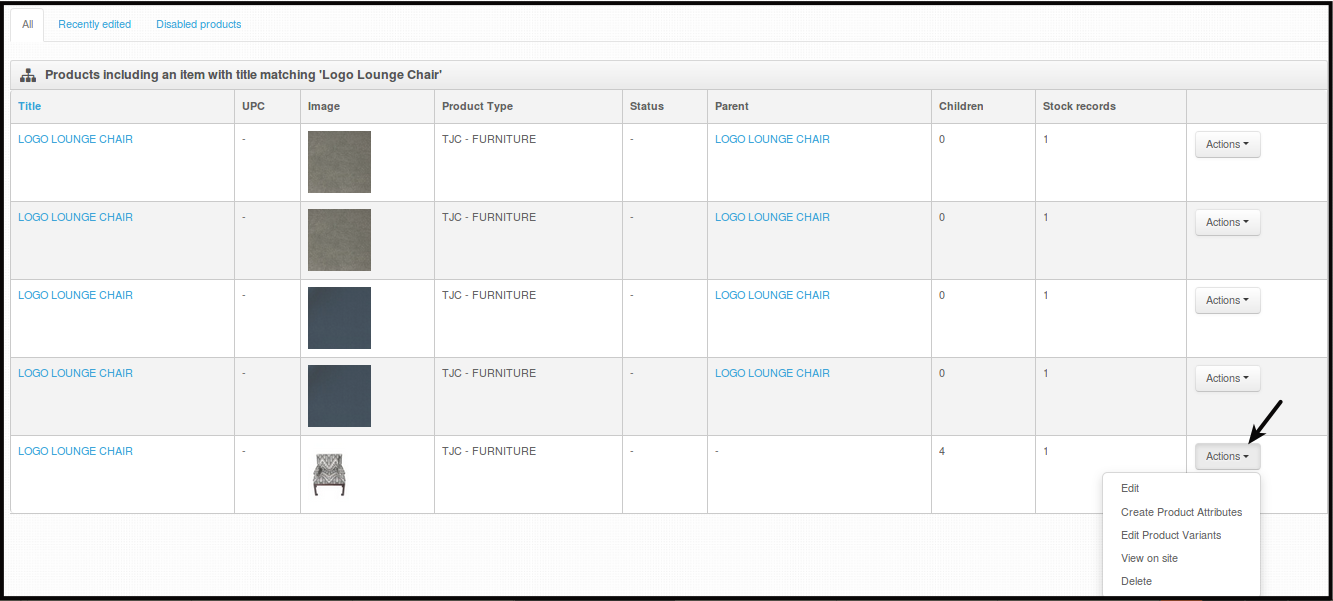
-
Click Edit Product Variants.
You will be directed to this page.
-
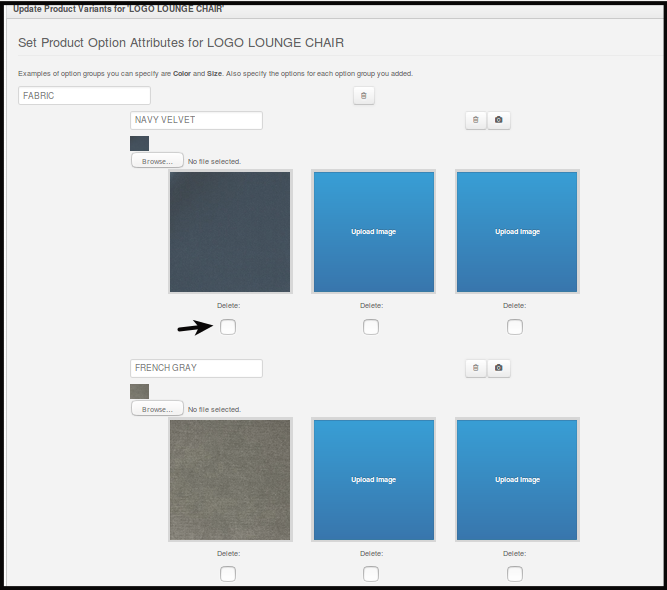
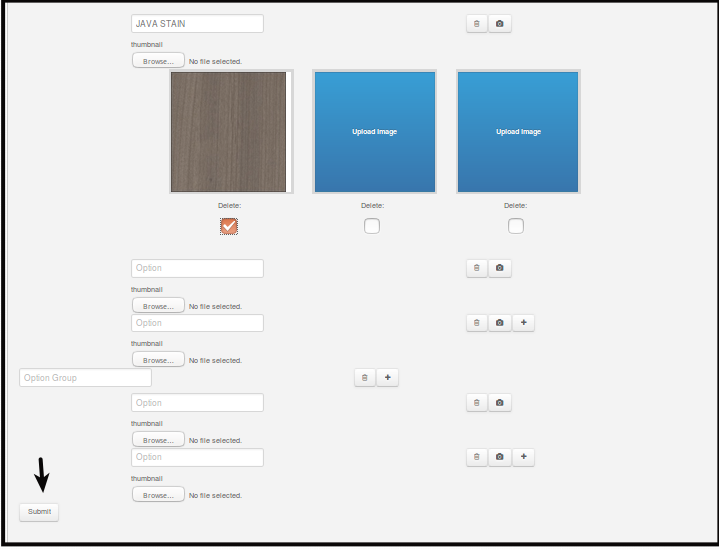
Click Delete box below the picture you want to delete.
-
Click Submit to delete the picture.
You will be directed to this page.
NOTE - You can only delete variant images with this option, Product Variant Edit > Product Images will not let you delete variant images but will let you upload additional images.
Viewing the Product on Site
-
Log in using Admin credentials.
-
Click Dashboard, Catalogue and then locate Products.
-
From the menu, select the product that you wanted to see on the site. Just click Actions, then select View on site.
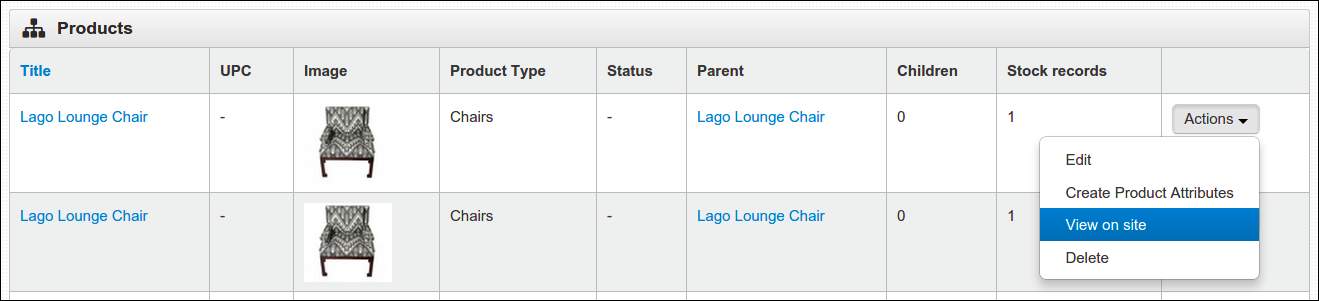
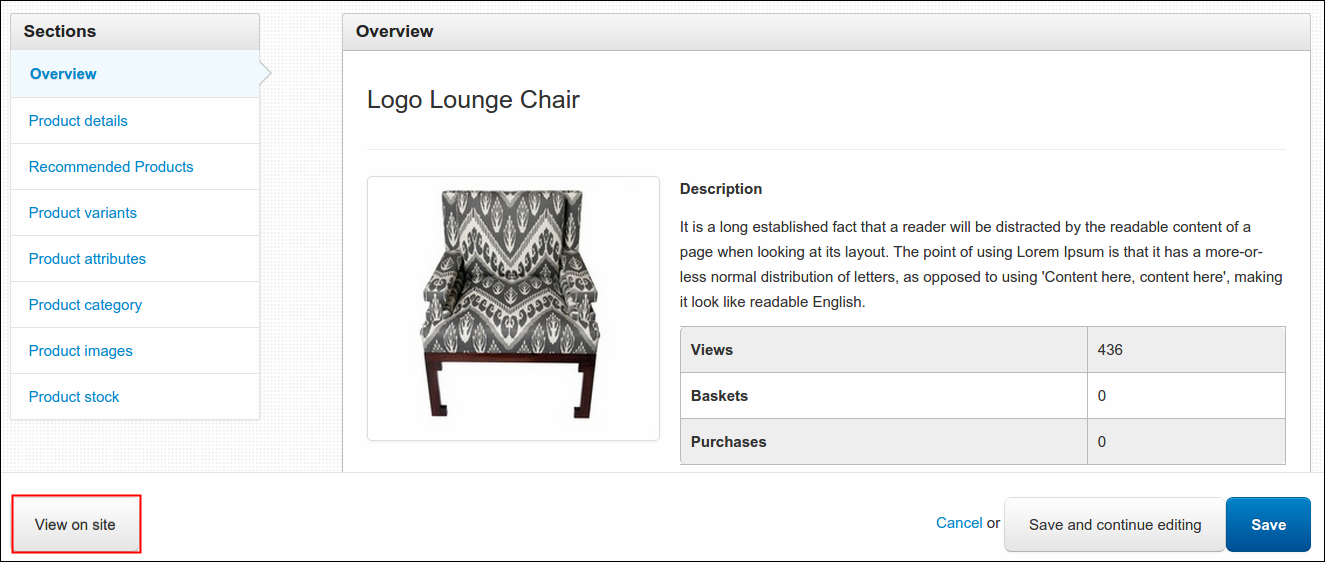
Note: While editing product, you may also view the made changes on site by clicking the View on site button located at the bottom, left side hand of the page.
Deleting an Existing Product
-
Log in using Admin credentials.
-
Click Dashboard, Catalogue and select Products.
-
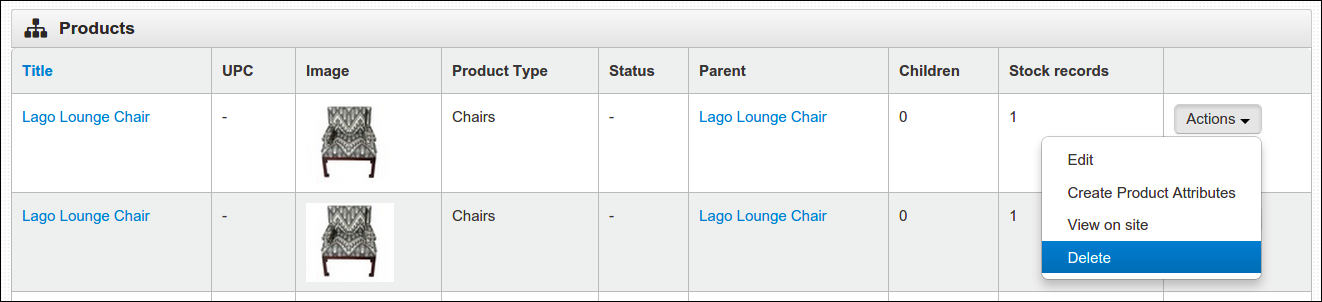
From the menu, choose the product that you wish to delete. Click Actions and select Delete.
-
A delete confirmation message will come out to validate your action. Here's what it looks like:
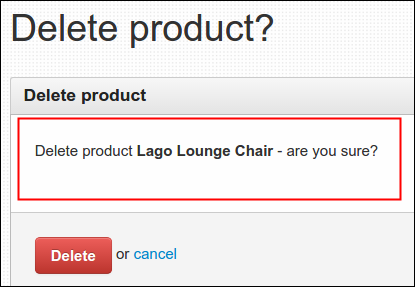
-
Click Delete to continue or Cancel to return to the menu.
Removing Quantity Option on Certain Products
-
Log in using Admin credentials.
-
In order to remove or hide the quantity option of a product, simply toggle the Is item one of a kind? from Product details section.

You can access this option in two different ways:
- first is from the time you are adding new product, if you are pretty sure that the product has limited piece then check this option right away. Follow the steps 1 to 6 from Adding a New Product and then enable the 'one of a kind' option.
- second is by editing an existing product either through the main site or dashboard, you can check any of these two instructions til you locate the Product details section: Editing an Existing Product through Dashboard or Editing an Existing Product through Site. Enable the Is item one of a kind? and click Save.
-
After enabling this option, display of quantity will be removed just like this...

-
At Shopping Bag page, one of a kind items is no longer editable. In case that customer changed their mind and decide not to buy the item, they can simply click Remove.

Changing the Product Pricing
The easiest way to change the product pricing is through main site. You need to sign in using Admin account, browse the product from Shop menu and click Edit this product link.

Update the Cost Price (gross price, including tax) and Price (net price, excluding tax) under Product Stock section and click Save. Another way to change the price of a product is through Dashboard, steps are as follows:
-
Log in using Admin credentials.
-
Click Dashboard, Catalogue and then select Products.
-
Go to Products table, tab should be placed in All tab to show all created products.
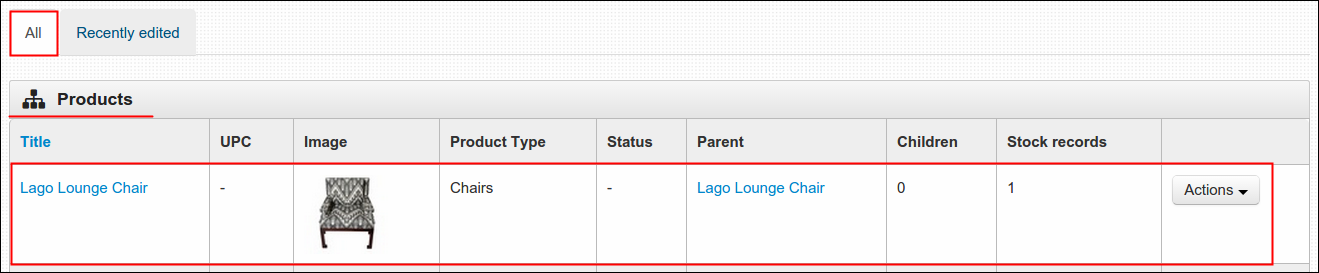
-
Locate the product that you wish to change the price, click Actions and select Edit.
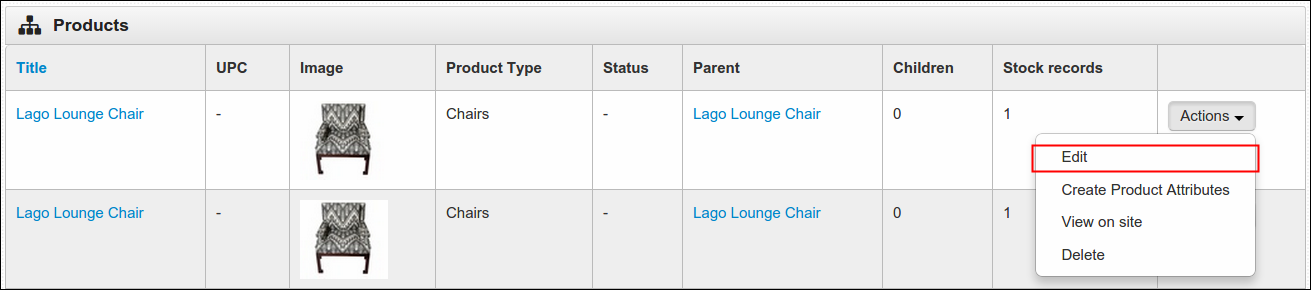
-
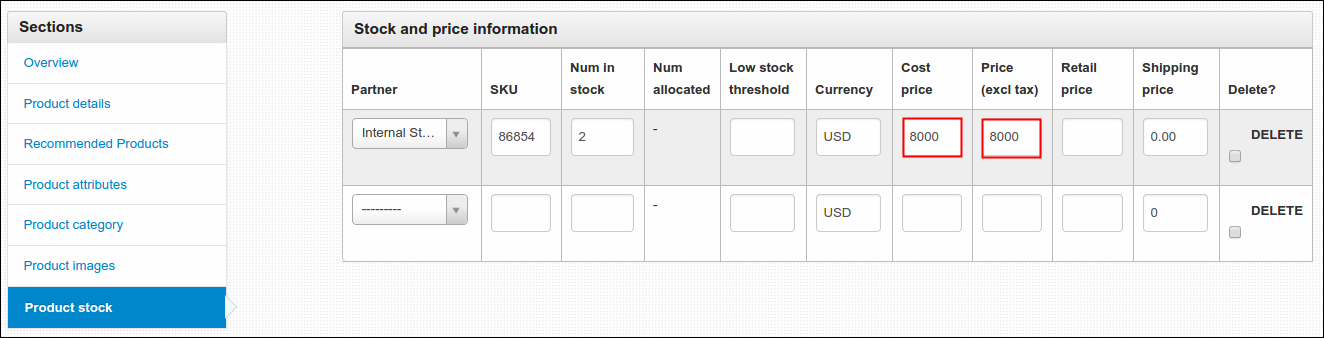
Proceed to Product Stock section and update the Cost Price (gross price, including tax) and Price (net price, excluding tax).
-
Click Save to continue. A confirmation message will appear that says selected product is now updated, to check your made changes, click View it on the site button and inspect the product price.
Edit Product Variant Price
-
Log in using Admin credentials.
-
Click Dashboard, Catalogue and then locate Products.
-
Search Title of the Product you want to Edit Variant Price of.
-
Click Search.
You will be directed to this page.
-
Click Actions beside the product variant you want to edit price of.
-
Click Edit.

You will be directed to this page.
-
Click Product Stock to be able to edit the product price.

You will be directed to this page.

-
This is where you can edit the price of your variant.
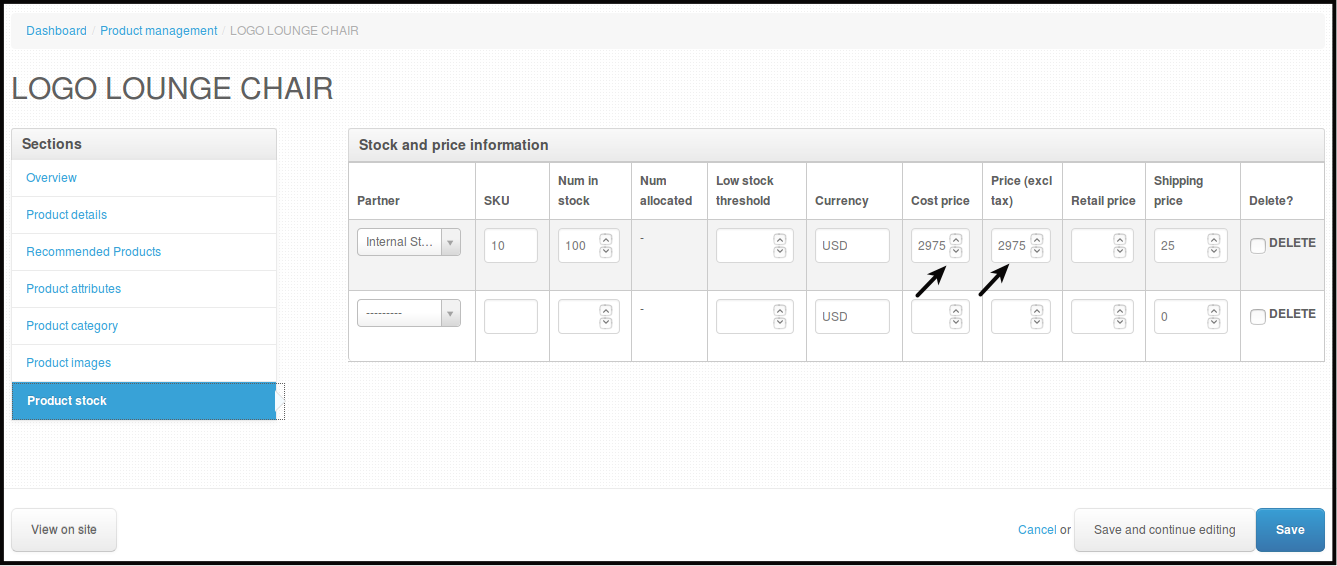
NOTE : This section is normally set manually.
-
Partner - Always set to Internal Stock.
-
SKU - You will define this according to what SKU you want to set.
-
Price excl tax - The Price you will put in here will be the Price that will be displayed on your website.
-
Shipping Price - Shipping fee for the product variant itself, you can set 0 if it is for free.
-
-
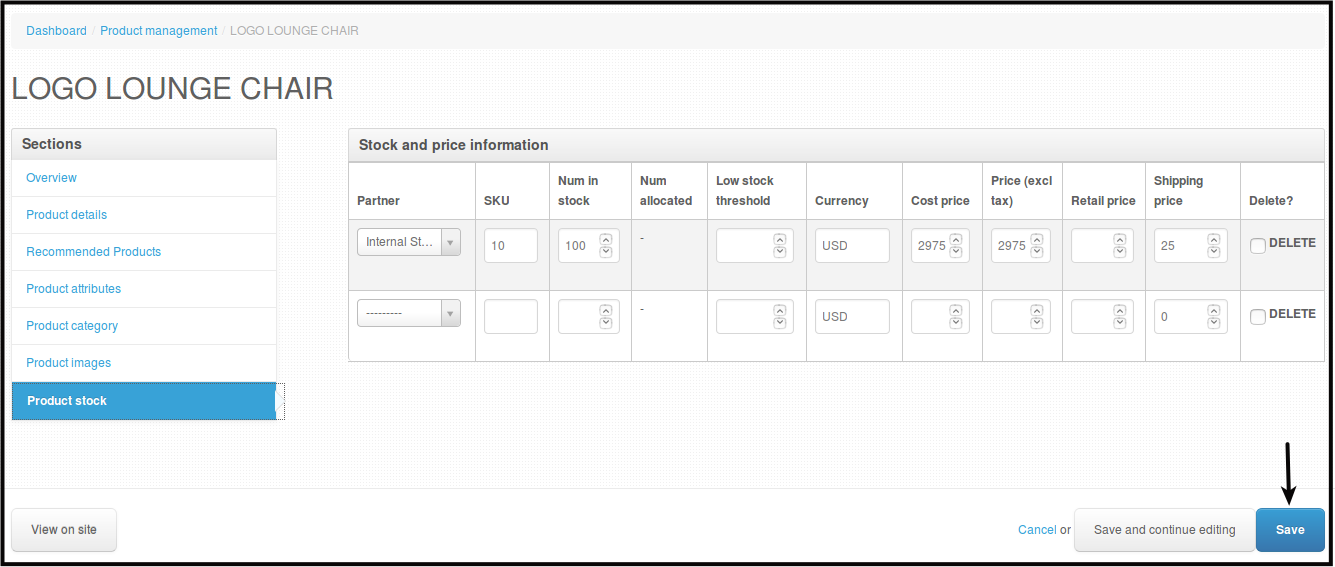
Click Save to save the changes.
You will be directed to this page.
Click View it on the site to check how it looks on your website.
You will be directed to this site.